Unleashing Stellar Magic: Phone Astrophotography Guide
Welcome to the fascinating world of astrophotography, where you can capture the wonders of the cosmos using just your smartphone. Armed with curiosity and a willingness to explore, you’re about to embark on a cosmic journey that will forever change the way you perceive the night sky. In this beginner’s guide, I will walk you through the essential steps, share some personal stories, and unlock the secrets to capturing breathtaking celestial moments with your smartphone.
➤ This post may contain affiliate links, purchases made through affiliate links may provide a commission for smartphone photography at no extra cost. Of course, all opinions remain our own. Please read the Privacy Policy for more info.

Preparing for your Astro adventure
It all starts with understanding the night sky. Get acquainted with how the night sky works, by learning about constellations, planets, and other celestial objects that are visible in your location.
Secondly, you will need to gather (buy) the necessary gear. Although you can start with just your smartphone, additional accessories like a tripod, remote shutter, smartphone adapter for a possible telescope, and a star-gazing app will greatly enhance your experience.
To give you a detailed overview of things you can prepare before diving into your celestial adventure, I have created the upcoming list.
1. Research and familiarize yourself with the night sky
- Study the night sky: Learn about the stars, constellations, and celestial objects visible in your location. This knowledge will help you identify and frame your subjects.
- Understand celestial events: Stay updated on upcoming meteor showers, eclipses, or other astronomical events that may offer unique photo opportunities.
2. Check Weather Conditions
- Choose a clear night: Check the weather forecast for your desired shooting time. Aim for nights with minimal cloud cover to maximize visibility and image quality. You can use an app like AcuWeather for iPhone and Android.
- Monitor moon phases: Avoid shooting on nights with a bright moon, as it can wash out the stars. Opt for nights closer to the new moon for darker skies. You can use PhotoPills for monitoring moon phases.

3. Find a Dark Sky Location
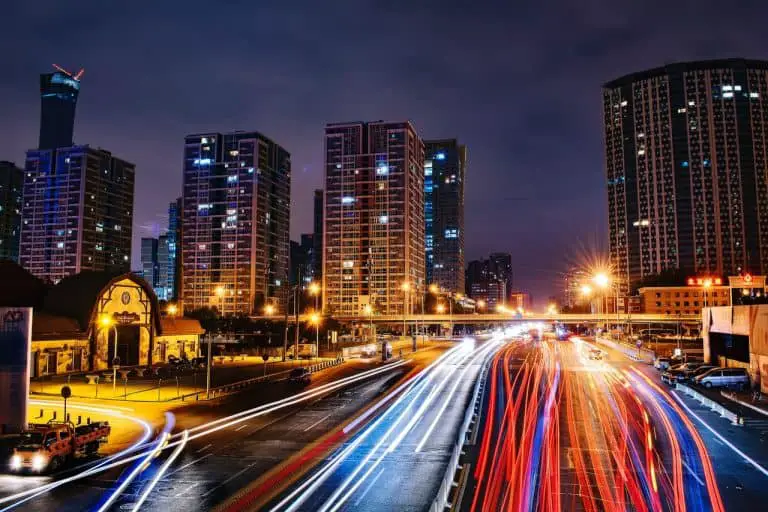
- Escape light pollution: Locate an area away from city lights to minimize light pollution. National parks, remote countryside, or designated dark sky sites are ideal.
- Utilize dark sky apps: Download apps like Dark Sky Finder or Light Pollution Map to identify areas with low light pollution near you.
4. Essential Gear for Astrophotography
- Tripod: Invest in a stable tripod to eliminate camera shake and capture sharper images, especially during longer exposures.
- Smartphone adapter: Purchase a smartphone adapter to securely attach your phone to the tripod. It ensures stability and allows for precise framing.
- Remote shutter release: Consider using a Bluetooth remote shutter release or a timer function on your phone’s camera app to prevent touching the phone and causing vibrations during exposures.
- Telescope and adapter for your mobile phone: To get even closer to the stars, moon, and planets, you could consider buying a telescope. The Celestron AstroMaster 130EQ Newtonian is a good telescope to get you started. It is possible to shoot images through the telescope with your phone. You will need an adapter to do so. You can read more about using a smartphone and telescope in this article.

5. Download Useful Apps
- Star-gazing apps: Install astronomy apps like SkyView (Apple/Android), Star Walk (Apple/Android), or Stellarium (Apple/Android) to help identify stars, constellations, and other celestial objects in real time.
- Camera apps: Explore third-party camera apps like ProCamera, Camera FV-5, or Moment Pro Camera for manual control over exposure, ISO, and focus. Most newer smartphones come with good manual control from the pro, professional or manual mode in the native camera app.
6. Familiarize Yourself with Your Phone’s Camera
- Find videos on how to use your camera: Review your smartphone’s camera capabilities to understand its features, possibilities, and any manual controls available.
- Experiment with settings: Practice using different camera modes, including manual mode if available, to understand how to adjust exposure, ISO, and focus. You can learn how to use these settings in this article.
7. Charge Your Phone and Bring Extras
- Ensure your phone is fully charged: Nighttime photography consumes battery quickly. Start your astrophotography session with a fully charged phone to avoid running out of power.
- Bring power banks: Carry portable power banks or extra batteries to extend your phone’s battery life during longer sessions. I use this portable charger with solar power for all my photography adventures. You can use the sun and a wall outlet to charge the device.
8. Dress Comfortably and Prepare for the Night
- Wear warm clothing: Nights can get chilly, even during warmer months. Dress in layers to stay comfortable during long exposure times.
- Bring snacks and drinks: Pack some water and light snacks to keep yourself hydrated and energized during the shoot.

My First Encounter with the Milky Way
I remember my first attempt at astrophotography vividly. Armed with my smartphone and a tripod, I ventured into a remote area away from city lights. As I looked up, a river of stars painted the night sky—the Milky Way in all its glory. There was no moon that night, so it was clearly visible. Excited and slightly nervous, I set up my gear and embarked on capturing the grandeur of our galaxy. I have to admit that the outcome was not as exciting as I felt about venturing into the wild at night. But you have to practice to become perfect.
How can I find the right location for astrophotography
Finding the right location for astrophotography is crucial for capturing stunning images of the night sky. Here are some steps to help you find the perfect spot:
1. Research Light Pollution Levels
- Light pollution is caused by artificial light sources and can significantly impact the visibility of stars and other celestial objects.
- Check light pollution maps or websites like Dark Sky Finder, Light Pollution Map, or Blue Marble Navigator to identify areas with low light pollution near your location.
- Look for darker regions away from cities, where the night sky is less affected by artificial lights.
2. Assess Accessibility and Safety
- Look for locations that are easily accessible and safe to reach, especially if you plan to photograph during the nighttime.
- Consider factors like proximity to parking areas, trails, and any potential hazards that may exist in the area.

3. Observe the Terrain
- Look for open areas with unobstructed views of the sky. Avoid locations with tall buildings, mountains, or dense tree canopies that may block your view.
- Seek out areas with interesting foreground elements, such as lakes, mountains, or distinctive landscapes, to add depth and visual interest to your astrophotographs.
4. Check for Atmospheric Conditions
- Choose locations with clear skies and minimal atmospheric disturbances like haze, fog, or high humidity, as they can impact the visibility and quality of your images.
- Consider the weather conditions and seasonal variations in your area to plan your astrophotography outings accordingly.

5. Use Smartphone Apps
- Take advantage of smartphone apps designed specifically for astrophotographers. These apps can help you find dark sky locations, identify celestial objects, and plan your shoots.
- Stellarium, SkySafari, PhotoPills, or Dark Sky Finder are popular apps that provide information about celestial events, light pollution, moon phases, and more.
6. Seek Local Knowledge and Recommendations
- Engage with local astronomy clubs, forums, or social media groups dedicated to astrophotography. Seek recommendations from experienced photographers who are familiar with your area.
- Local photographers can provide valuable insights about the best locations and ideal shooting times for astrophotography in your region.

7. Consider Travel Opportunities
- If you have the flexibility and desire to capture astrophotographs in unique locations, plan trips to areas renowned for their dark skies, such as national parks or remote rural areas. The Mount Cook area, in New Zealand, is one of the Dark Sky locations I visited a couple of years ago. It is absolutely breathtaking.
- Research popular astrophotography destinations and consider joining photography workshops or events held in these locations.
Finding the right location for astrophotography involves a combination of research, local knowledge, and exploring new places. Be patient, stay persistent, and embrace the adventure of discovering breathtaking spots where you can capture the wonders of the night sky.
What are the preferred camera settings for astrophotography?
Although every night and location needs different settings to create the best images of the night sky, there are a few things and settings to keep in mind to get the best possible results.
Manual Mode
Switch to Manual Mode or Pro Mode on your smartphone camera or use a dedicated camera app that allows manual control over settings. Manual mode gives you greater flexibility and control to adjust various parameters according to specific conditions.
ISO
Start with a higher ISO setting to capture more light from the stars. Typically, ISO 800 to 3200 is a good starting range. Experiment with different ISO values based on the brightness of the stars and the level of noise you find acceptable in your images. Keep in mind that higher ISO settings can introduce more noise, so finding a balance is crucial.
➽ You can find a full guide on how to use ISO in this article.

Shutter Speed
Use longer exposure times to capture the faint details of stars and other celestial objects. Start with exposures ranging from 10 to 30 seconds. Longer exposures allow more light to reach the sensor, enhancing the visibility of stars and revealing intricate details.
Don’t forget about the Earth’s rotation, as longer exposures can cause stars to trail. Shooting star trails is actually a lot of fun too.
Aperture
Almost all smartphones have a set aperture. So you cannot change the opening size of the the lens. It is helpful to have a phone that has a large aperture (small number). It will allow a lot of light to pass through the lens. Look for a phone with an aperture smaller than f/1.9
The Samsung Galaxy S23 has a wide-angle lens with an aperture of f/1.7 and the iPhone 14 pro and max have an aperture of ƒ/1.78. Google Pixel 7 Pro has an aperture of f/1.85. But you don’t have to buy yourself a flagship smartphone to capture the night sky. The Samsung Galaxy A54 has an aperture of f/1.8.

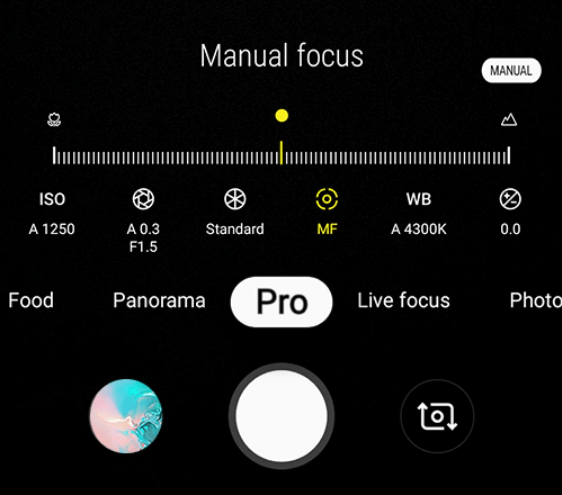
Focus
Switch to manual focus mode and set the focus to infinity (∞) to ensure sharpness for distant celestial objects. Some smartphones or camera apps may have a manual focus assist feature that helps you achieve accurate focus on stars.
➽ More on how to focus manually in this blog post.
Noise Reduction
Consider enabling noise reduction in your editing software. These settings can help reduce digital noise in your images. However, keep in mind that noise reduction can sometimes soften fine details, so it’s important to find the right balance during post-processing. You will have to take your image in RAW format!
RAW Format
If your smartphone or camera supports it, capture images in RAW format instead of JPEG. RAW files retain more data and offer greater flexibility for post-processing, allowing you to enhance details and adjust exposure without significant loss of quality.
➽ More on using RAW format images in this article.
Don’t use digital zoom
It might sound like a good idea to use zoom and get closer to the subject in the sky, but it is not. Digital zoom is just a crop of the image you are taking and does not enhance the photo. Some smartphones have optical zoom, like the Galaxy S20FE, one of my phones. You can use this type of zooming. Better is to use a telescope or pair of binoculars.
Test and Experiment
Remember that astrophotography settings can vary based on factors like light pollution, moon phases, and equipment capabilities. Experiment with different combinations of ISO, shutter speed, and aperture to find the optimal settings for your specific shooting conditions. Take test shots and review them on your phone or computer to assess exposure, noise levels, and overall image quality.
More on how to edit your astrophotos
Now you are ready to edit your astrophotos with your phone. What the best way is to create stunning stellar images, you can find in this next blog on night sky photography.
And if you like to know how to capture the Milky Way, you can read this blog.