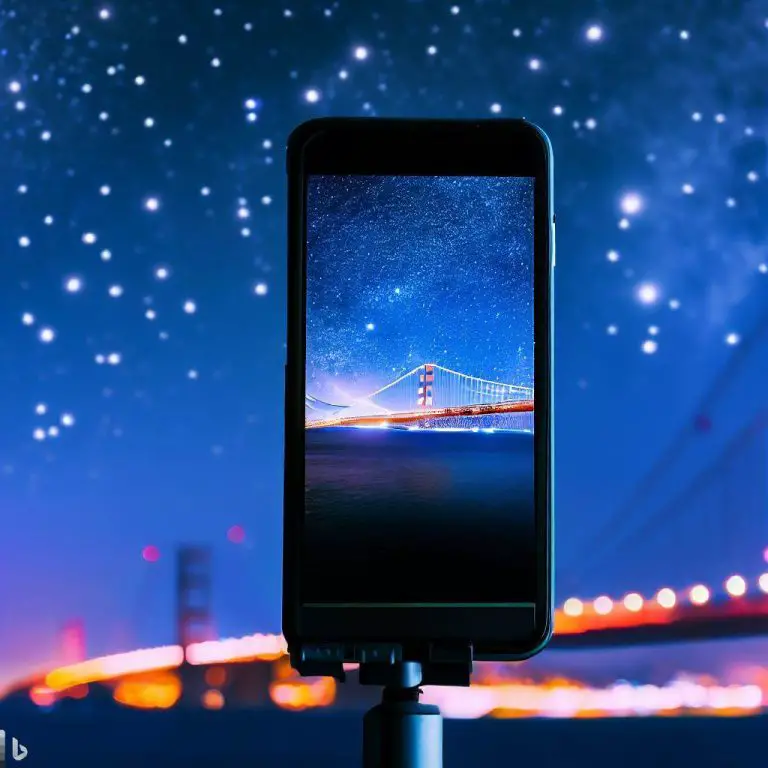
How do you photograph the Milky Way with a Smartphone?
You gotta love those stary nights with clear skies and thousands of stars shining in the darkness. One thing most landscape photographers love is an interesting sky. Well, the night sky can be one of the most interesting ones you can photograph, but how on earth can you capture the most exciting part of all with your cellphone?
You can photograph the Milky Way with your smartphone on a moonless and cloudless night when the stars are brightest. Use the longest shutter speed possible, bring a sturdy tripod and a wireless remote shutter, charge and bring an extra battery, and use a smartphone app to locate the milky way.
It doesn’t sound too complicated, does it? Well, there is a bit more to it than just bringing the right gear. This blog will guide you through settings, applications, and gear choices to get you going. So let’s dive in and discover the Galaxy.
➤ This post may contain affiliate links, purchases made through affiliate links may provide a commission for smartphone photography at no extra cost. Of course, all opinions remain our own. Please read the Privacy Policy for more info.
The gear I used for writing this blog can be found on my favorite gear page.

What gear do I need to capture the Milky Way with my phone?
To capture the Milky Way with your smartphone, you will need to bring several items. Here is a list of my gear, which I also use to shoot night-time images. All equipment is pretty affordable, so you don’t have to break the bank, and conveniently available from Amazon.
- Smartphone
- Sturdy semi-professional tripod with smartphone mount
- Remote shutter
- Powerbank or spare battery
- Microfiber cloth
- Headlamp (my choice) or LED flashlight
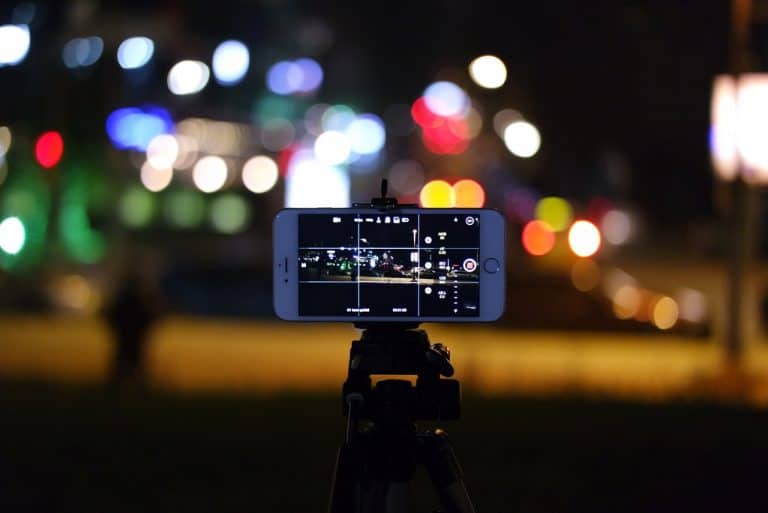
You will need a tripod and remote shutter to shoot night sky images because you have to hold the smartphone entirely still. Every little movement can ruin your pictures due to the long shutter speed required to take these kinds of photographs. So please do not skimp on these two items.
How do I capture the Milky Way on my phone?
Choose a moonless night without clouds in a pitch dark environment without light pollution. Find the Milky Way in the sky or use an app to do so. Use a tripod and remote shutter to steady your smartphone camera, choose a shutter speed between 30 en 60 seconds, an ISO of 1600 to 3200, and point to the stars.
First of you will need to choose a good night to photograph the Milky Way. Next, check when there is a new moon. In this phase, the moon is precisely shutter speed between the world and the sun. Therefore, the side of the moon that we can see from earth is not illuminated by the sun and becomes invisible in the night sky. You can use an app to know when the next new moon phase will begin.
Secondly, you need a very dark environment without some kind of light pollution from cities, buildings, or roads nearby. Visit several areas at night so you can determine which places are suitable.
Thirdly, revisit the most suitable site when there is a new moon and start taking images. In the next paragraph, I will show you which settings you need to make beautiful photos of the Milky Way.
What settings should I use to photograph the Milky Way?
Milky Way photography requires you to set three parameters manually; ISO, Shutter Speed, and Aperture. Unfortunately, not many smartphones come with aperture control. But you can set ISO and Shutter Speed. In addition, you should turn off the flash, choose the highest image quality possible, and focus manually.
Here are the six steps you can follow for Milky Way photography with your phone:
- Choose a long shutter speed
- Focus manually
- Set ISO as low as possible
- Turn off the flash
- Shoot RAW images
- Set picture quality as high as possible
1 Choose a long shutter speed
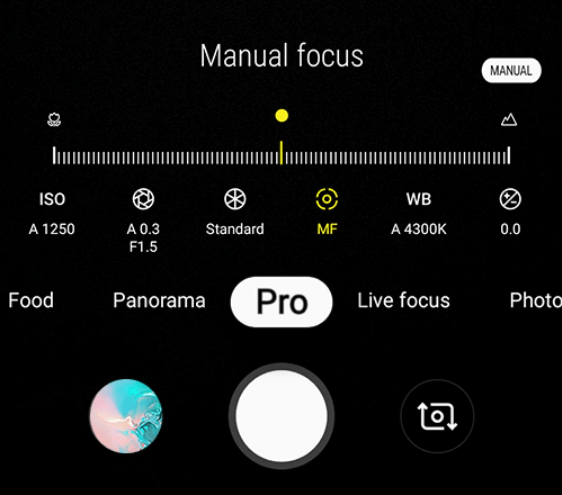
Since the light of the Milky Way is relatively soft and weak, you will need a very long shutter speed of 30 to 60 seconds. You can set this by using the manual mode (also called pro mode or professional mode) in your smartphone camera app. It is very helpful if you have a phone with a high-end sensor like one of the flagships phones of Samsung, Apple, Huawei, and Xiaomi.
My smartphone has a maximum shutter speed of 30 seconds which I can choose from the shutter speed drawer in the Pro Mode of my native camera app. See the image below.

Some cameras have a longer shutter speed or make it possible to use an app that allows extra-long shutter speed. Or they come with a light painting mode like my cellphone does, which will enable you to start ‘recording’ an image when you remotely release the shutter. See the image below. This photography mode will allow you to choose the necessary shutter speed.

Long shutter speed apps for iOS:
Long shutter speed apps for Android:
- Manual Camera DSLR Camera Professional
- Pro Cam X Lite
- Pro Cam X (HD Camera Pro)
2 Focus manually
Another advantage of the Pro or Manual Mode in your camera is setting the focus manually. Otherwise, it would be impossible to focus ‘on’ the Milky Way. It is just too far away. You can find manual focus (MF) in the settings of the pro camera mode.

3 Set ISO as low as possible
Although you will need a high ISO value, usually somewhere between 1600 and 3200, try to set it as low as possible. The higher the ISO, the brighter the stars and lights in the Milky Way, but the more unwanted noise and pixels you will see in the image.
Pro tip: It is possible to shoot multiple images at different exposures, which you can later stack together to reduce noise. You can use Adobe Photoshop or Lightroom to stack the images.
4 Turn off the Flash
While many beginner photographers may think flash will help night-time photography, it does not work in astrophotography. Therefore you must turn off the flash. Cellphone camera flash only works on objects and people that are close to the lens. The Milky Way is too far for the flash to affect it.

5 Shoot RAW images
RAW images will give you way more creative freedom when you edit your photos. However, you will need to use big pushes in brightness to create stunning Milky Way images, so set image ‘size’ to RAW in the pro or manual mode of your phone’s camera.
RAW images are unprocessed images with much more information about light, contrast, and color. Of course, your smartphone has to be Camera2 API ready to take RAW images with the native camera or third-party app. You can read all about it in this blog.
6 Set picture quality as high as possible
Set the picture size and quality to as high as possible. You will find options in the settings of your native camera app. For example, you can set the resolution of this phone (see below) to 24MP (Megapixels) with a ratio of 4:3. Most smartphone cameras come with a standard image ratio of 4:3; my advice is to leave it at that; it will give the best results in terms of quality.

What is the best smartphone for Milky Way photography?
The best smartphones for Milky Way Photography are the flagships of well-known manufacturers. Still, if your budget does not allow for such an investment, you can do astrophotography with a more budget-friendly one:
Best choice available from Amazon:
Samsung Galaxy S21 Ultra
Highend phones:
Samsung Galaxy S20 Plus
Samsung Galaxy S21 Plus or Ultra
Apple iPhone 11 Pro
Apple iPhone 12 Pro
Apple iPhone 13 Pro
OnePlus 8 Pro
OnePlus 9 Pro
Huawei P40 Pro
Huawei P50 Pro
Budget choice:
Samsung Galaxy A72
Apple iPhone SE2020
Xiaomi Redmi Note 10 Pro

What is the best camera app for night sky photography?
When you are ready to take some awesome Milky Way photos with your smartphone, you could use some help from third-party apps. Here are a few I use:
- Dark Sky Finder – best light pollution app to see where it’s darkest near you, available for iOS – Android
- 1Weather – not only one of the best weather apps but also an overview of the moon phases, available for iOS – Android
- The Photographer’s Ephemeris – a web and mobile application to help visualize the Milky Way, available for iOS – Android
- Sky View – for quickly identifying the stars, constellations, and planets in the night sky, available for iOS – Android.
What is the best time to capture the Milky Way with my cellphone?
The best time to capture images of the Milky Way with your mobile phone is on a moonless and cloudless night between May and September in the Northern Hemisphere. The sky is pitch black, and stars are clearly visible. Chances of creating Milky Way images with your phone significantly improve when there is no moon.
Your smartphone camera lens is not as sensitive as a DSLR one, and the result would be awful with too much light from a moon or even a city nearby. So make sure the environment is extremely dark!
Use a weather app to see when you have the most significant chance of a clear night sky and find out the darkest places on earth in this paragraph. Please make sure you avoid places close to cities, harbors, and industrial areas because they add too much light to the environment.
How do you locate the Milky Way?
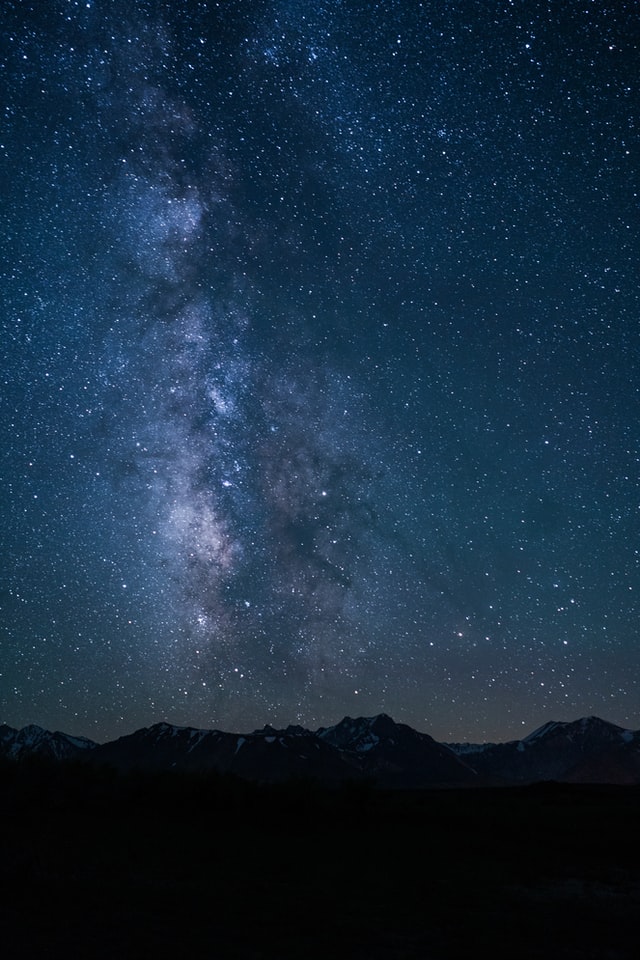
Once you have found a dark location, a clear sky, and no moonlight, it is time to look for the Milky Way in the sky. The actual Milky Way is pretty big, but most photographers look for the core of the Milky Way. It is the brightest and most beautiful part of the visible Galaxy.
If you live in the Northern Hemisphere, the brightest part of the Milky Way is best visible in the summer months between mid-March and mid-October. It is easiest to find after astronomical twilight and before dawn close to the horizon. In the southern hemisphere, you can find the Milky Way directly overhead around June.
The Milky Way is constantly moving around in our night sky, so you can use an app to locate it or look up and search for Cassiopeia, Cygnus, and Sagittarius. Cygnus, the swan, is flying in an incredibly thick part of the Milky Way.
Can you see Milky Way with the naked eye?
It is possible to see the Milky Way with the naked eye from a very dark location on a clear night with no moonlight. However, light pollution can ruin your Milky Way Experience by the amount of artificial light sent into the sky. The best way to spot it with the naked eye is by looking for a typical truly dark site or excellent dark sky site.
The typical truly dark sites and excellent dark sky sites score a 2 and 1 on the Bortle Dark-Sky Scale, which you can see in the image below. It has a scale from 9 to 1, which measures the night sky’s brightness, or better said, the darkness of a particular location. Dark is better!

If you live in or near a big city, you may never even have the chance to see many stars, let alone the Milky Way. There is just too much light pollution. Try to leave the city and suburbs and look for some rural skies and dark sites. You can use a site like Dark Site Finder to locate the darkest place near you. You might have to travel a bit to find the Truly Dark Sites. There is a lot of light pollution in the northern hemisphere.
Where is the Milky Way visible on earth? Dark Sky Places
The Milky Way is best visible on one of the assigned Dark Sky Places. There are over 180 certified Dark Sky Places in the world. You can find them with this Dark Sky Locator on the website of the International Dark-Sky Association.
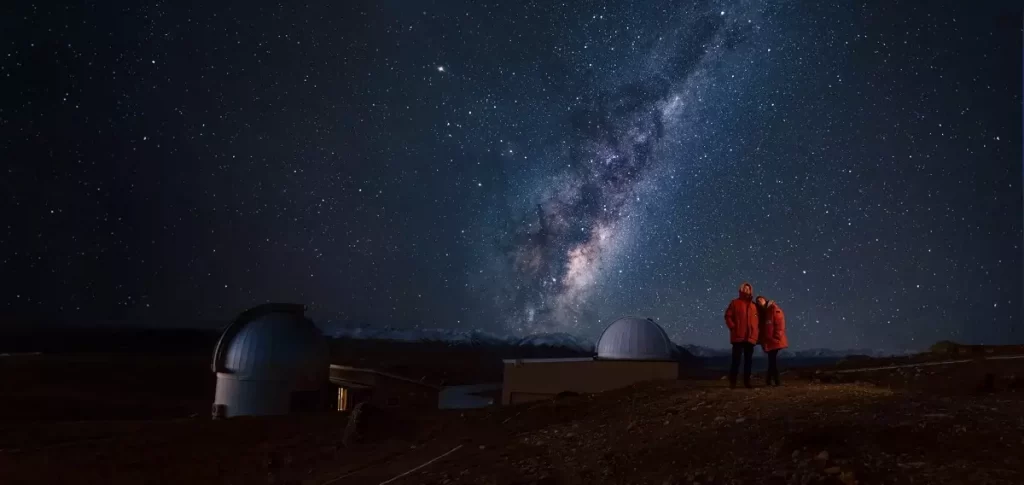
One of my favorite spots is the Aoraki Mackenzie region near Mount Cook on the south island of New Zealand. It is stunning there. Other beautiful places to see the Milky Way are the Waterton Lakes National Park and Glacier National Park near the Canadian Border.
You can find many dark sky places in Utah, Nevada, Colorado, and Arizona in the United States of America. Take a look at the interactive map and find your preferred spot to take Milky Way photos with your smartphone.

Where is the darkest place on earth?
The darkest place on earth is Roque de Los Muchachos Observatory, located on La Palma, the Canary Islands in Europe, according to a new study by the Instituto de Astrofisica de Canarias. With 11 million photometers from 44 of the darkest places, the institute was confident in its decision.
Other dark spots from this research include Sierra Nevada in the US, the Montsec commune in northeastern France, and Extremadura in Spain. You might even call them the second darkest places on earth.
Night skies are never wholly dark; even in very remote locations, there is some glow in the atmosphere produced by natural phenomena from the earth and the Galaxy.
Where is the darkest place in the United States?
One of the darkest places in the United States is Massacre Rim Wilderness Study Area, and therefore, perfect to go stargazing and take Milky Way images with your phone. You can find the exact location on the interactive map of darksky.org.
The Massacre Rim Dark Site is an immense area of darkness and, in 2019, added to the designated International Dark Sky sites. The title does not come with legal protections, but land managers must preserve the night sky and comply with several lighting policies.

Get started with Milky Way Photography while using your phone
I hope this article is a good way to get you started with Milky Way photography. Don’t forget! Practice makes perfect. Take a lot of time to try to find the best settings, excellent locations, and be patient. If you like taking images during nighttime you will also love this blog post about how to take images of the northern lights with your phone.

How to Take Images Through a Telescope with Your Smartphone
The universe’s wonders have always fascinated me; telescopes provide a window into the celestial realm. With the advancement of technology, it is now possible to capture stunning images of the milky way, its planets, and other astronomical objects using your smartphone. In this article, I will guide you through capturing…
How can I edit astrophotos made with a phone?
Editing astrophotos captured with a phone can help enhance the details, colors, and overall quality of your images. While the exact editing process can vary based on personal preferences and available editing tools. In this article, you will find some general steps to consider while editing your astrophotos. Transfer RAW…
Unleashing Stellar Magic: Phone Astrophotography Guide
Welcome to the fascinating world of astrophotography, where you can capture the wonders of the cosmos using just your smartphone. Armed with curiosity and a willingness to explore, you’re about to embark on a cosmic journey that will forever change the way you perceive the night sky. In this beginner’s…
How can I capture the moon with my phone?
The moon is one of the most beautiful and captivating objects in the night sky, and with modern technology, it is now possible to capture its beauty with your smartphone. In this blog post, I will show you how you can take stunning images of the moon with only your…

How Can I Capture Northern Lights With My Smartphone?
Northern lights can be a rarity to come across depending on where you live. Many people capture the natural event with their professional cameras, but how can you capture the northern lights with your smartphone? You can capture the northern lights on your smartphone using landscape mode, turning off the…