How do I capture the mist and fog on my phone?
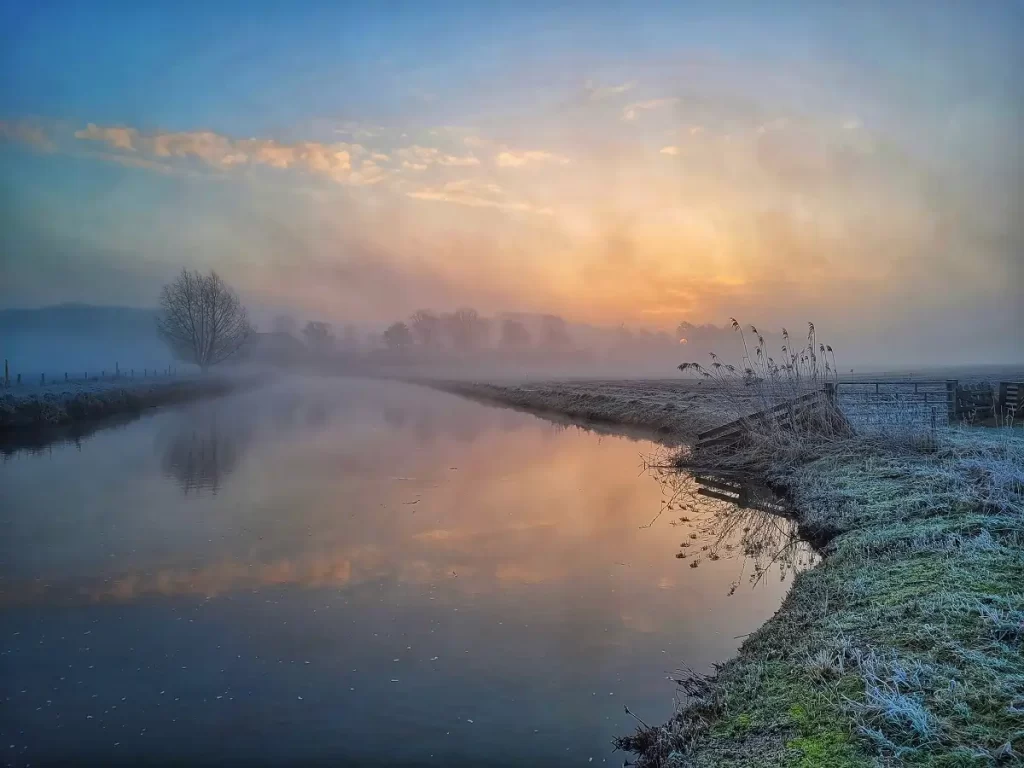
When the nights become colder and the days shorter, the chance of seeing fog in de early morning increases. Because fog consists of tiny little water drops, the (minimum) temperature needs to be lower than the dewpoint temperature. Other factors that improve the chance of fog and mist are little or no wind and humid conditions around lakes, rivers, stream valleys, and wetlands. These conditions make for incredible photography opportunities.
But is it possible to capture nature’s most fairytale-like settings with a mobile phone? It is possible to take beautiful photographs of mist and fog with your iPhone or Android phone. Make sure you shoot RAW images, use a tripod and remote shutter, use manual focus (if necessary), and take advantage of the histogram while shooting moody pictures.
➤ This post may contain affiliate links, purchases made through affiliate links may provide a commission for smartphone photography at no extra cost. Of course, all opinions remain our own. Please read the Privacy Policy for more info.
The gear I used for writing this blog can be found on my favorite gear page.
11 tips to take stunning pictures of fog with a phone
Where do you start when you want to take unforgettable photographs of fog and mist with your phone? Just follow these eleven easy steps, and you can get started.
- Check the weather forecast
- Look for mist and sunshine
- Use a tripod and remote shutter
- Bring a microfiber cloth to clean your lenses
- Use the histogram
- Use manual focus during thick fog
- Edit your RAW fog images
- Use a telephoto lens
- Use the fog to create silhouettes
- Look for dew drops
- Try black-and-white photography
1 Check the weather forecast
Fog and mist are created by cooling (very) moist air. For example, you see the mist in the morning and evening as a layer (ground fog) above the meadow. But fog can also severely limit your view of the road. You can’t see further than ten meters.
Because the fog usually does not last long, keeping a close eye on the weather forecast for the coming morning (or evening) is helpful. You can use a website or app like Clear Outside. Fog can occur all year round, but you will most likely see this natural phenomenon in the fall and winter.

2 Look for mist and sunshine
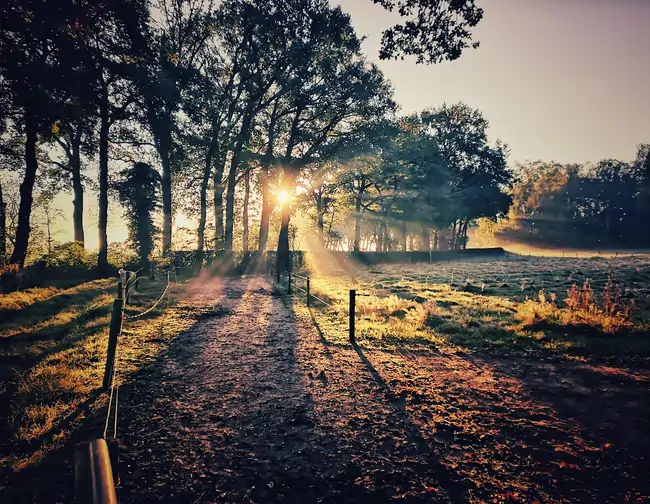
If the sun appears during a foggy moment, you’ve got your hands on gold. The sun heats the air quickly, causing the fog to linger for a short time. Photograph towards the sun, so you create a very warm atmosphere in your photo.
Mist in combination with sunlight refracted by, for example, leaves and trees, results in beautiful sun rays, also called solar harps. Opt for backlighting or side lighting because that’s the best way to capture the rays. The fog does not have to be very thick to see the rays of light on your smartphone pictures.
3 Use a tripod and remote shutter
When you shoot with your phone early in the morning or at the end of the day, there is little light on a cloudy day. If you photograph in the forest, the light intensity is usually even lower because the vegetation blocks the light. The shutter speed required is then too long to photograph by hand. You get movement in your image. Make sure you have a tripod and wireless shutter. This prevents blurry photos and how not to increase the ISO value too much so that your photos contain less noise.
You can use a professional tripod or a Joby Gorillapod like I do. And a remote shutter from the Moment Store to release the shutter button from a distance and without touching your phone. Both will help create super-sharp photos.
4 Bring a microfiber cloth to clean your lenses
Foggy mornings have a lot of moisture in the air. Your lens will get wet quickly as a result. Bring a couple of microfiber lens cloths to wipe away condensation. I use these cloths from Amazon; they can last a long time.
5 Use the histogram
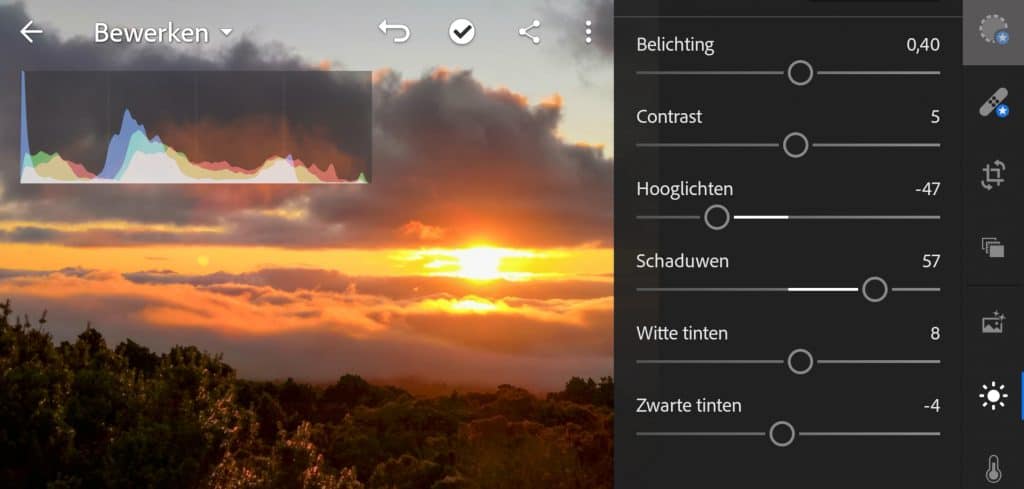
Fog and mist photos often have a lot of white or light gray. Therefore, use the histogram to check the exposure in the photo. The photo is often underexposed when the peak is centered or left of center. Then correct the exposure. You can adjust this when you use your camera’s manual or professional mode in the native camera app of your smartphone.
Is there a histogram on iPhone and Android Phones?
Some iPhones and Android smartphones come with a built-in histogram, or you can use the Moment Pro Camera app or Photo Extension Histogram for iPhone. Another possibility is opening your RAW image in Snapseed (iOS and Android) and pressing the bar chart icon in the bottom left corner. It will open up the histogram. The same is possible with Lightroom for Mobile, also available for iOS and Android phones.
6 Use manual focus during thick fog
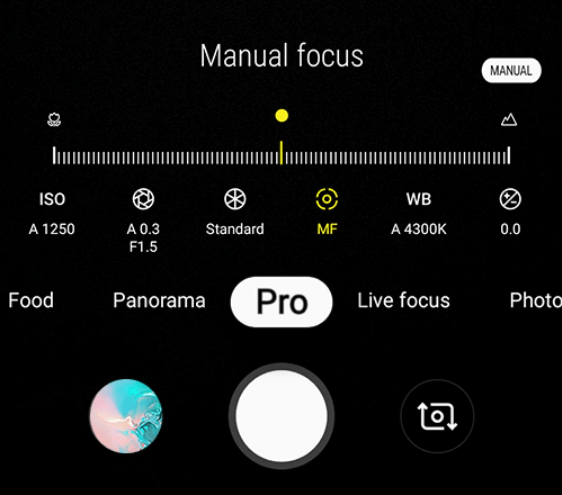
When photographing thick fog, the autofocus of the smartphone camera may have difficulty focusing due to a lack of contrast. Then try to place the focus point on one element that stands out against the fog. For example, you can think of a book or a branch or control the focus by focusing manually.
➽ You can read how to focus your smartphone camera manually in this article.
7 Edit your RAW fog images
Although I recommend editing your RAW images, do so minimally. You don’t need to change much to create stunning eerie, or dreamy photographs. You can use Lightroom for Mobile or Snapseed on your phone. You can easily tune the image by making color adjustments, using black and white, and changing contrast, brightness, shadows, white balance, and saturation with both of these applications.
8 Use a telephoto lens
Is the fog or mist in the far distance? Or is it a thin layer above a field? Try using a telephoto lens from your phone or an add-on lens (my favorite one from the Moment Store). I usually say zoom with your feet, but that can be difficult on foggy mornings. When you walk closer to the mist, it will appear farther away again when you think you have reached the beginning. There are a few exceptions, like at the forest’s edge or above a lake.
9 Use the fog to create silhouettes
Because the background is usually much brighter due to the mist, you can use fog to shoot silhouettes. These silhouettes appear in the image as dark objects. The fog emphasizes the shape of a subject because dense fog obscures the details.

10 Look for dew drops
Fog consists of floating water droplets. On a foggy day, you can see many water droplets on cobwebs, fences, plants, and flowers. You can make beautiful creations of hundreds of tiny drops with a macro lens.
➽ You can find my favorite macro lens in the Moment Store.
11 Try black and white photography
Black and white fog images can be stunning and add to the eerie feeling you want to capture. Foggy mornings without sunshine tend to have only a tiny bit of color. You can enhance the monotonous character of the photo by using black and white. I recommend taking the image in full color (raw image size) and editing it post-processing in Lightroom for Mobile (or Snapseed).
Fog photography with your iPhone or Android phone can be challenging, but with these eleven tips, you can get started. Try different manual settings and see what kind of pictures you prefer. Keep an eye on the weather, bring your tripod, remote shutter, and microfiber cloths and plan your trip. Of course, you’ll be snapping some mystical pictures.
Can smartphone cameras pick up fog?
Smartphone cameras do pick up fog and mist. You can create eerie and mystical photographs with the proper gear, like a tripod, remote shutter, and microfiber cloths. Use manual focus when the fog is pretty thick and shoot RAW images. If you are looking for dreamy-like photos, find some sunshine and shoot toward the light.
Difference between fog and mist
So as you know, there is a difference between fog and mist. Fog is denser than mist, and you can see less than 1.000 meters away. There are more water molecules in the air in a fog. It will cut down your visibility compared to mist. The mist will resolve more quickly when the sun begins to shine.


