How can I create an orange and teal effect with my smartphone?
Have you ever seen those Instagram profiles with amazing popping pictures with beautiful oranges and blues? Big chance you are looking at the orange and teal effect that is widely used in the photography industry.
This article will guide you through several methods to create your orange and teal filter. Don’t worry; it is not difficult to accomplish. Just keep in mind, less is more. Please do not overdo it!
➤ This post may contain affiliate links, purchases made through affiliate links may provide a commission for smartphone photography at no extra cost. Of course, all opinions remain our own. Please read the Privacy Policy for more info.
The gear I used for writing this blog can be found on my favorite gear page.
What is the teal and orange filter?
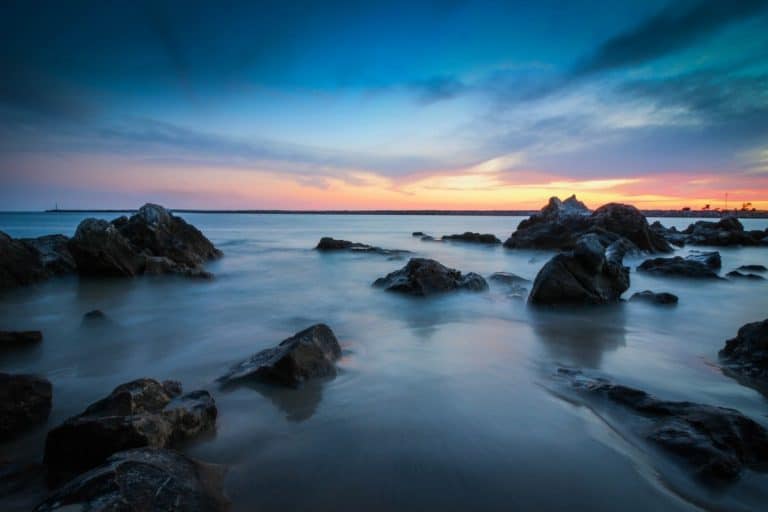
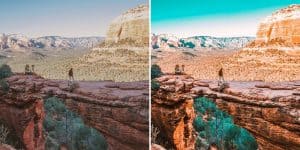
An orange and teal look is a popular color grading method used by photographers and videographers. This filter effect accentuates the skin tone colors in the highlights to pop from the blues in the background and shadows.
It is relatively easy to create an orange and teal effect. You ‘simply’ push the blues/teals in the shadows and oranges/yellows in the image’s highlights. Or you can buy a ready-made filter online to speed up the process.
Which mobile apps can I use to create an orange and teal effect?
There are many different mobile apps you can use to create an orange and teal effect. You can choose applications like Lightroom Mobile, Snapseed, or VSCO to create this effect. Or you can use the orange and teal effect application, Orange Teal, from the Android Store, and Orange Teal from the Apple Store.
You can change color calibration, HSL siders, or split tones to create the desired effect or a combination of all three of them.

How can I create orange and teal in Lightroom Mobile?
There are different ways to create the famous orange and teal effect in your images by using Lightroom for Mobile. The goal is to tune the yellows and greens towards orange and blues towards teal. Here is one way to create the effect:
- Ensure the photograph is adequately exposed, has the right amount of contrast, and that the shadows are not too dark.
- Create an S-curve in the Tone Curve Panel under the light tab. You can choose the white circle to change the overall image.
- Go to ‘Mix’ and adjust the red, orange, and yellow tones. Add a bit more saturation and change the hue to the left (warmer tones).
- Adjust the teal and blue colors as well. Add a bit more saturation and change the hue to the left.
- Change the other colors, like greens and purples as well. They need to be less present in the images by pushing the hue slider to the left and decreasing saturation.
- Pomp up the vibrance and saturation (if necessary) a bit to create nice saturated colors. Please don’t overdo it.
- Export the image. You have now created your very own teal and orange look. You can even save these steps as a preset so you can adjust other photos faster.
Lightroom Mobile for Android & iOS.
How do I change orange and teal in Snapseed?
A simple way to create the orange and teal effect in Snapseed is by using curves. You want to add reds in the highlights and blues in the shadows. Here is how that is done in just a few steps.
- Open your image in Snapseed
- Go to curves
- Choose the red color, add red in the high lights, and decrease reds in the shadows by creating an S curve.
- Go to the blue color and do the opposite. So add blues in the shadows and reduce blue in the highlights.
- Add a little green in the highlights (less than the reds). Leave the rest of the color as is.
- Adjust the rest of the image by changing exposure, brightness, shadows, etcetera.
- Save and export your image.

How to set orange and teal effect in VSCO
The easiest way to create the orange and teal effect with VSCO is by starting with the C7 filter. After that, change exposure, contrast, shadows, highlights according to your taste. Change the color profile by adjusting the HSL sliders. You want to enhance the red, orange colors, adjust yellow to orange, adjust green to yellow, and blue to teal. Here are the steps:
- Open your image in VSCO
- Add the C7 filter (or any other C filter you like)
- Adjust exposure, contrast
- Open or darken shadows
- Adjust highlights
- Go to the HSL tab to change the color profile a bit more. If necessary, add a bit more saturation to the orange and teal colors.
- Save your image, et voila!
Where can I buy Orange and Teal presets and filters?
If you don’t want to make, your orange and teal presets, you can buy them online. Several image editing apps come with built-in presets, which you can access while using the application’s paid version. But you can also purchase mobile presets online for just a few bucks.
Here are three of our favorite Orange & Teal presets available on the Internet.
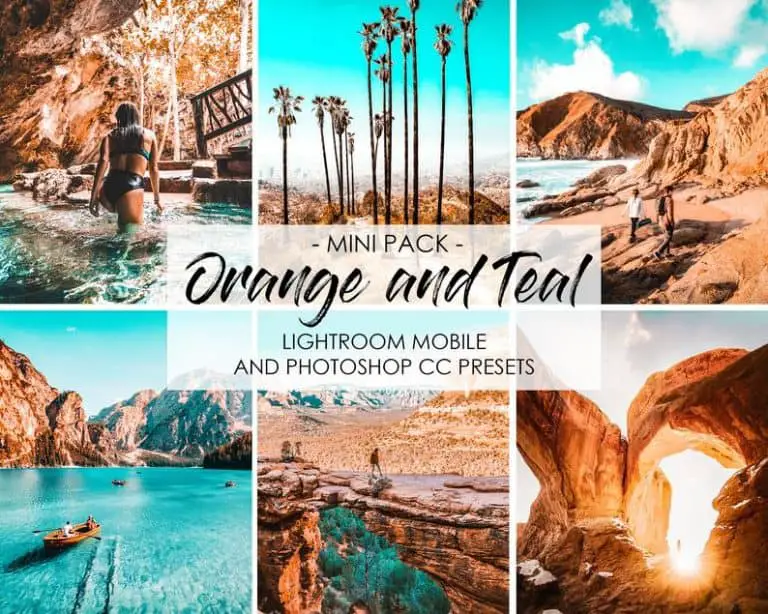
1. Six Lightroom Presets Orange & Teal Mini
It is a high-quality toned orange and teal preset for Instagram and works exceptionally well with travel photography. The presets will help you improve light, color, contrast, tone, and vibrancy in your photos.
There are 6 Android and iOs presets available for Adobe Lightroom Mobile (DNG files) so that you can edit your images on the go. You can use them on JPEG and RAW photographs. Make sure your smartphone has iOs version 11 or later, or Android 8 or later.
Artmyhouse has created this orange and teal minipack, and it is available online for $6.00 (prices may vary in time). With over 850 five-star reviews, it is worth your while.
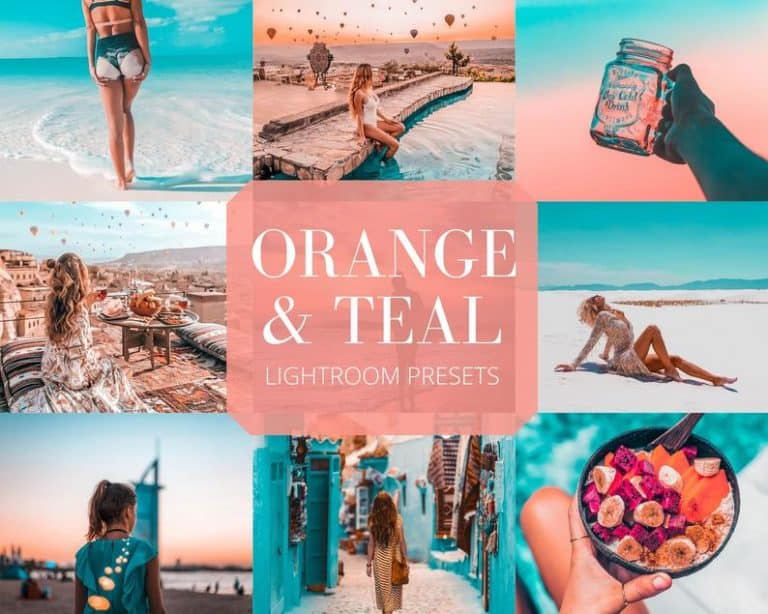
2. Orange and Teal Lightroom Presets by Sarah Presets
It is another high-quality Lightroom preset set for mobile and desktop. You will get eight presets in DNG and XMP file format, which you can use in Lightroom Mobile and Desktop. Sarah will send you a step-by-step guide on how to implement them.
You can use the presets on RAW and JPEG files, making it very easy to use on the go. It is a perfect and cheap pack for photographers who don’t want to make their filters and presets. It only costs you around $2.00 for eight presets. You cannot go wrong here!

3 Milano Lightroom Preset Mobile Teal and Orange
The Milano pack is another excellent orange and teal preset bundle by DolceVitaPresets. The effect is a bit softer than the other two packages but beautiful nonetheless. It works well on travel and city photography.
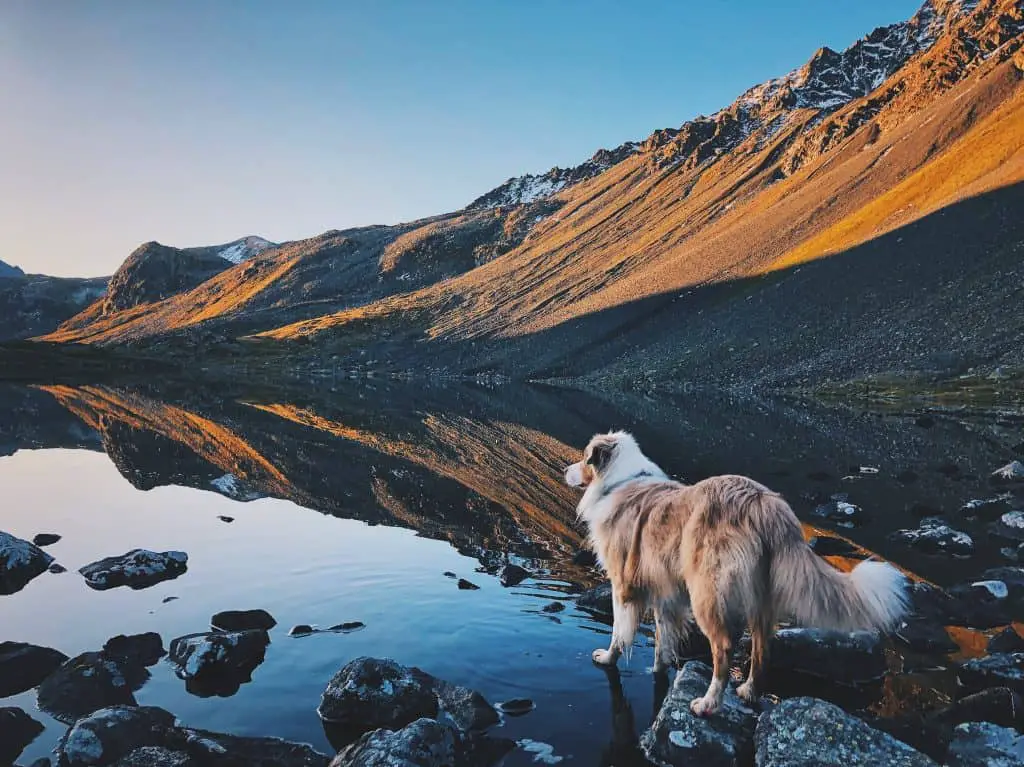
When you use one of the presets on your mountain images, you will see a light blue sky with intense whites in snow and clouds. The final images will have a soft and warm glow.
You can find the presets online for around $4.00 at the moment of writing. Please be aware; prices may vary.
You can find more interesting Orange & Teal filters for Smartphone Photographers here.

Why is the Orange and Teal effect popular?
For many years cinematographers have used the orange and teal effect in movie pictures. In the last decade, the filter has become widely adopted and shared by photographers. A couple of years ago, you could find stunning Instagram profiles with orange and teal-looking pictures.
In every photo or video of people, there is a skin color present. No matter your complexion, all the skin colors come from the same small part of the color wheel. Some skins are darker, and others are lighter, but all colors come from the color wheel’s orange section.
To add contrast to an image, you can use different techniques; one is color contrast. You can create a color contrast by using complementary colors from the color wheel. A color wheel shows us which colors complement each other and are therefore pleasing for the eyes. Opposite colors work well together and make each other pop. As you can see in the image below, orang and teal are opposite to each other. So movies started to feature this color scheme because the human skin tone belongs to the orange color range.
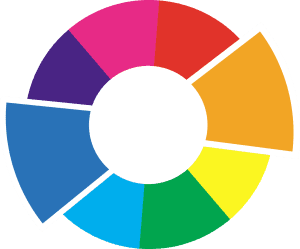
Secondly, teal and orange have the highest contrast between their exposure values of the color wheel’s complementary colors.
And lastly, orange and teal used together will give a similar feeling to an image as the golden hour does. The warm orange highlights reflect in the same manner against the blue tones in the shadows.
Orange and teal are here to stay because it is not a trend. It has always been appealing to the human eye, and it always will be. A good time to start adding this color contrast to your image! Try a saturated teal and orange look and go for a much more subtle variation and see what you like best. If you want a quick result take a look at our favorite Orange & Teal Presets for Smartphone Photographers.